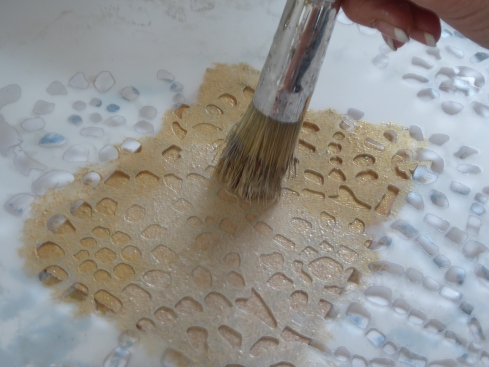
Ok this one will be short and sweet.  A torn stencil can stress out anyone in the middle of a project.

P1010052

In continuation of our blog series on painting with allover stencils, this video explains exactly how to fix your stencil and keep going! Hope this helps.

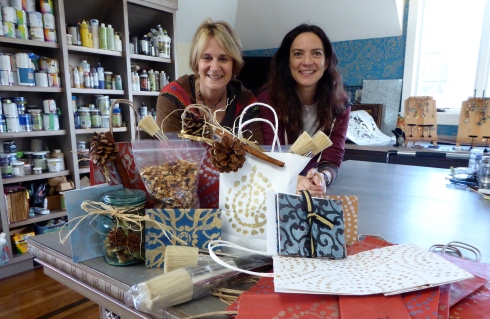
First of all…Let us say “Happy Everything” to all of our readers and customers!!  It’s a time to stop and reflect upon how lucky we are to be able to do something we love everyday. So today we thought we would share how much fun we had creating gifts with our Wallovers stencils. If you are the proud owner of some our Wallovers stencils, regular or mini you can easily spend the day before christmas making all of your own decorative packaging! Here’s how.

First, find (or purchase if necessary) some paper card stock. Fold it in half and cut in half. Then base coat them with various different acrylic colors. We used gold, black,  light blue and navy blue.

P1000936

P1000934

Next, choose one of your Wallovers stencils and a Wallovers Edger brush and stencil the entire card while open.

Package all 4 cards with envelopes and tie with a ribbon and Voila… you have your gift!
P1000940
Now for all of your packaging. …

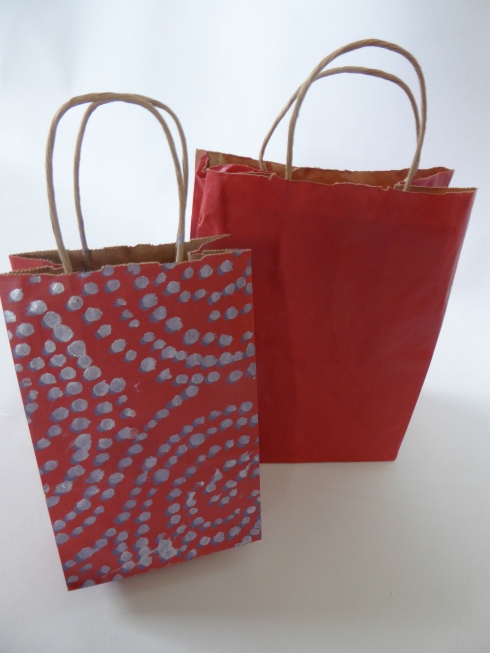
Collect all the empty white or kraft bags and boxes you have around your house. Choose some stencils out of your collection. and get stenciling.

P1000931

P1000933

Once your bags are painted…. of course you can use them to package anything.

P1000939


We made Cynthia’s famous granola and packaged it up in our beautiful stenciled bags.

P1000990


Here’s the recipe.

Dry ingredients:
Old fashioned oats, slivered almonds, millet, cinnamon
Wet Ingredients: Maple Syrup, honey, canola oil, vanilla
Add in mixed dried berries (yellow and brown raisins, dried cranberries apricots or whatever you want!)
Mix one large container Old fashioned oats, one package slivered almonds, 1/4 cup millet and 1 tablespoon cinnamon
Pour the wet ingredients mixture of 1/2 cup canola oil, 1/3 cup honey, 1/3 cup maple syrup, 1 teaspoon vanilla over the dry ingredients. Mix it thoroughly with the dry ingredients so they are all slightly moist.
Spread the mixture onto 4 cookie sheets. Don’t make it too thick. Bake on convection at 325 until golden brown. Check it often and flip it with a spatula especially if you do not have convection!
Let air dry. After it cools add the berries and enjoy with yogurt, ice cream or milk!

Enjoy and happy Holidays. See you in 2016!!!!!!

Love Cynthia and Rena

Wallovers is the orginator of “the topper”. So what’s a topper, you ask? If you have ever attemped to paint and “allover” design on a full wall you will be familiar with the dreaded end of the job task;  completing the space that is left at the top of the wall. (You can see this illustrated later in the blog video). Well we were sick and tired of cutting our stencil and trying to match up the design or getting our hair cuaght in masking tape while trying to lift the stencil over our heads to finish off the top of the wall.

 the Topper

So we invented the “Topper”. The Topper is a precut, open ended stencil that fills in the gap that is left near the ceiling after completing an allover design. Simply peel off the adhesive backing, place the stencil flush to the ceiling, and stencil away! Each design that wallovers sells has its own Topper and you’ll only need one for the entire room.

Other companies now offer a top piece and some even include them in every alover stencil for free. We do not do this because you only need one topper for several field stencils and often can use the topper again and again on several jobs. So for $14 you have the one topper you need instead of us giving you one that you don’t need with each purchase, causing us to drive up the price of our stencils.  So if you are doing a sampleboard or a furniture top, you really do not need the topper. Take a look at this video and hope it helps.

If you have any questions, your Wallovers girls are always here for you at info@wallovers.com! Happy Stenciling!

Welcome to the blog series for our decorative painters and do-it-yourself friends who want to learn more about stenciling gorgeous “allover” designs. Allover designs are an awesome alternative to wallpaper. This beautiful bathroom was created using Wallovers Ethnic Grid with Mod insert by decorative artist, Joyce Arbonne.


IMG_0365

They can be customized in any color imaginable and save you or your customers looking through endless wallpaper books.

Karma_Article1

The finished result is spectacular and …. no one can find any seams. Years later, if tastes change, the walls can be easily updated with another paint application without messy wallpaper removal.

So here we go. Blog number one is about applying spray adhesive to the back of your stencil. When starting to apply a stencil on your walls the most important item in our bag of supplies, (after the awesome “Allover” brush) is spray adhesive. We happen to love the least expensive and most accessible (you can get it in any local craft store), Elmer’s Multi-purpose Spray Adhesive.

P1000777

We’ve created a video here to help you understand the best way to apply it. So watch and get going on your exciting project. Stay tuned for more helpful videos from your Wallovers girls!

Carey Dougherty, Founder of Her Haven, is an incredibly special person. Her organization brightens the lives of many in the inner city of Bridgeport, Connecticut.

dougherty_2

Her Haven was founded on the belief that comfort and beauty do make a difference in all of our lives. The organization brings the gifts of designers and artists to those most in need. Her Haven changes the lives of women by offering them a haven in which to thrive, dream and prosper.

This story is all about partnership and collaboration. When Carey is at the tail end of a project she has contacted me to add a special touch to the space, a quote or a painted surface. Sometimes my schedule will not allow me to help or he job is too big for me to tackle. When Carey called me about sprucing up the entry to the Prospect House Homeless shelter in Bridgeport, it dawned on me that I could do a lot more for her if I had the decorative Painting “dream team”.


10441139_10152507334549524_7746465887094438857_n

10464310_10152507334644524_6583494223358556206_n

Entry of Prospect House Shelter before the project

Hoping others would see the importance of her work, I reached out to some of the best decorative artists in Connecticut. Within a day Sharon Leichsenring, one of Connecticut’s most talented muralists, responded by offering to hand paint the shelter mission on the entry wall.

10383643_10152504706159524_1934166524358500874_n

She also introduced me to the talented artist, Peri Pfenninger  who had just moved to the area from the west coast. Holly Whiting, who is also a contributor to the Canvas Peace Project, immediately responded as well and drove all the way from Hartford to help. Rena Paris of Cynthia Designs  did not bat an eye about offering her valuable time, (she has 3 kids under the age of 5) so that’s a big sacrifice. She came to stencil the walls with speed and precision.

10390134_10152504704919524_220009199645252470_n

On June 9 and 10, the new team of Her Haven decorative painters gathered in the lobby and hit the decks. Arches became windows and the walls took on an elegant Moroccan design using Wallovers, “Stained Glass ” stencil and Modern Masters mix of Pale Gold and Gold Rush opaque paint.
10440703_10152504705734524_8615095227875894710_n

1512526_10152504705994524_605683324824747739_n

Holly and Peri hand painted the bricks and Sharon hand while everyone watched in amazement at their talent and precision.

10299933_10152504705249524_4611415044396684283_n

10352565_10152504705094524_4195297247284279424_n


Peri did an amazing job painting the colorful pots, we added some flowers, birds and topiaries and in a
day and half the space was transformed.

10433945_10152507334799524_5557757731681014727_n


The team of 5 had never worked together, yet it was like a perfect dance… all the colors came together, everyone knew what to do without barely speaking a word and the seasoned (over 100 years) of experience in the room took control with hardly a plan.

10294290_10152507334999524_6272069278298884633_n

There is nothing more gratifying that seeing talent used to cheer up the lives of others. I think I speak for all of us when I say that we received way more than we gave. Isn’t that always the case with voluntering?

Message from Carey to the artists….“I truly felt like I was watching both a symphony and a ballet, by how in sync you all were to bring forth your creative talent in such a collective way. The result was beyond what I could have ever imagined: beautiful, inspiring, filled with underlying messages of peace, tranquility, hope and dignity. I cannot thank you enough.”

1901947_10152504705539524_6767182865610795425_n

Thank you Carey and the Her Haven decorative painters! For more information on joining the Her Haven team please reach out to Cynthia at cynthia@cynthiadesigns.com

Krakow, Poland is one of the most beautiful cities I have ever been to. Today steph and I will take a walk through the many parts of the city eating kilebasa, smoked cheese and stuffed cabbage in the old Jewish section of Kazimierz, but yesterday….

we spent the day in silence as we toured the site of one of humanity’s most unspeakably horrifying tragedies a hour and a half away; The site where the Nazi’s murdered 1,100,000 people; Auschwitz-Birkenau.

IMG_0409

It is a person’s duty after visiting this site to tell the world what happened here. So for readers that have not made this visit, I know this may not be easy  but I ask you, in honor of the victims and genocide awareness month, to read on or look up your own information on this and other Nazi extermination camps.

IMG_0406

Jews were not the only victims of the Nazi’s plan to rid the world of “undesirables”, homosexuals, disabled, gypsies and resistors to the regime were among the victims of their extermination plan.

Auschwitz is broken into three camp areas. We first visited Auschwitz I.

IMG_0405

To enter you must walk under the iron sign bearing the phrase “Arbeit Macht Frei”, “work sets you free”. An ironic message as the only way to gain freedom in the camps was through the chimneys of the crematoriums. Prisoners selected to weld the sign, in a small act of defiance, placed the ‘B” upside-down.

There was nothing more surreal than standing on the dirt path next to the train tracks that were the arrival site of Jews at their final destination at Birkenau. I had seen the picture of the guard tower dozens of times and learned about it my entire life but to be there hit me deep in my soul.

IMG_0420

I felt the fingertips of my daughter reach out and grab for mine. I felt her compassionate hand throughout the rest of the tour on my back. At Auschwitz II, prisoners were separated upon arrival, mothers from their children, husbands from wives. The strong would go to Auschwitz I and live for approximately 2 months until the work, torture or starvation killed them. The others, less strong children, women, disabled would go directly to the gas chambers. To avoid panic, the Nazi’s told their victims to remember where they had hung their clothes so they could retrieve them afterwards.

IMG_0412

Shoes left behind by victims who entered gas chambers

At Auschwitz I camp we toured the barracks where prisoners were crammed in groups to sleep on wooden slats, the execution wall where those who committed crimes such as stealing some bread were shot and starvation cells for prisoners and those who tried to escape.  We learned about everyday life; 12 hours of severe work conditions with a dish of liquid food and without proper clothes.  twenty percent 20% of the victims in the prison were children. We saw how the people went from deported to dehumanized, each step of the way reducing them from a person to an object with a number  thus making it possible for SS soldiers to carry out their “final Solution”.   Prisoners also carried out acts such as removing teeth and hair from bodies after the gassing and shoveling excrement. In fact, taking one of these jobs was possibly the only way to survive in the camps.

After the Nazis realized that Auschwitz I was not big enough to handle the amount of prisoners or the amount of killings they needed to achieve in an hour (4,500 deaths in 3 hours was not sufficient speed), they built Auschwitz II,  a more efficient death camp.

IMG_0415


Entrance to gas chamber at Auschwitz II

Birkenau made Auschwitz I look like a 3 star hotel. The Nazi’s plan was to grow Birkenua to an even larger capacity as it ws still under construction and expansion in 1945 during the liberation of the camp.

Steph and I returned to Krakow in silence. As we started to speak about what we experienced and how we felt, We asked each other so many unanswerable questions. What brings a human being to follow such commands and act so monstrously? How is it possible to survive the conditions we witnessed even for a short time? We both agreed we could not have been strong enough. What does it mean to say “never again’?  Isn’t it the responsibility of nations to protect civilians from human rights abuses?  Isn’t that what the world was supposed to have learned?  Isn’t that the purpose of the memorials we see, the films we watch, the books we read? Does “never again”  only have meaning for a white person, a European, a Jew? Why do we know that monsters who kill innocent people for power and resources still carry out their operations as we speak? We cannot forget those who suffer in displaced persons camps around the world today, those who have been taken into lives of slavery and abuse or who suffer at the hands of violence, discrimination and monstrous leaders. The only way to make “never again” a reality is to coninue to speak about the abuses we see.

Today I heard that my friend and Carl Wilkens Fellow, Mealnie Nelkin, will be receiving The Humanitarian Award  by the Georgia Commission on the Holocaust. This award is given to individuals or groups that have “demonstrated the spirit of humanity through volunteer work, advocacy, leadership and/or philanthropy in their community, thereby fighting indifference, intolerance and injustice.”  Melanie has ben an advocate for genocide prevention for years. A nonstoppable force in Washingon DC and an inspiration to many. I dedicate this post to her for her continued commitment to genocide prevention.

Our Journey took us one hour from the center of Prague to Terezin, the concentration work camp and ghetto.

Image

 Terezin was originally a fortress prison established in the late 18th century as a prison for military and political convicts. In 1941 it was used by the Nazi’s as a prison for Jews. Jews that were brought to Terezin from Prague, some 83,000, with the exception of a handful of survivors, were never seen again.

Image

They were all deported to extermination camps in the East.

What is most poignant about visiting Terezin is not the cold stone cells, cramped ghetto barracks or crematorium, all chillingly horrifying but the multitude of artists, composers, musicians, writers and actors that left behind the real, untold story of Terezin. You see, the Nazi’s wanted the world to think they had set up a beautiful home for the Jews at Terezin and they knew they had captured some of Prague’s most talented people in the small space of the ghetto to tell that false story. As part of their grand scheme, the Nazi’s used this talent to create drawings and films, poems and songs of propaganda.

Image

Viewing the films and paintings created under Nazi instruction, one would think that life was wonderful in Terezin. Jewish soccer matches, knitting clubs, art exhibits, plays and operas were occurring at all times. What was really going on here was beyond the brain’s capability to comprehend.

Image

Bedrich Fritta, Leo Hass, Otto Unger, Karel Fleischmann, Peter Klein….. Do these names ring a bell? Probably not like Pablo Picasso, Vincent Van Gogh, and Henri Matisse do, because these Terezin artists were exterminated along with their families by the Nazi’s long before they reached the age of 25.

 Terezin artists were given materials by the SS to create propaganda pieces but many brave prisoners, once given these materials, used them to depict the real, untold story of life in the ghetto.

Steph and I spent hours sifting through books of drawings, inks, pastels and paintings created by hundreds of courageous Terezin artists, risking their lives each day but knowing that someday their work would be found and would set the record straight about the treatment of the Jews at Terezin.

ImageReading the biographies of hundreds of prisones who had graduated from some of the best art and architectural schools in Europe brought each artist to life.  These weren’t prisoners, they were lives filled with hope, talent, intelligence, families and love. In Terezin they turned into  historians, teachers, and activists for peace.

Image

The Nazis continued their propaganda work in Terezin making it appear as a beautiful Jewish settlement. Building a spa and fake store fronts so visitors to Terezin would think it was a town filled with shops and cafes. They even distributed worthless “camp” money to be used when visitors came from the outside.

Image

On June 23th, 1944 as thousands of prisoners were being deported to Auschwitz and other Eastern death camps, Terezin was presented, films and all, to the international delegation as a self-administered Jewish settlement, the inhabitants of which has the opportunity to survive the war without any worries.

Visiting Prague with my daughter is a dream. The narrow cobblestoned streets, ancient castles, gardens, cappuccinos and …let’s not forget the hot wine!  Colorful photos in front of John Lennon’s peace wall and decorative  beautiful doors abound.

IMG_0327

In the Jewish Quarter The spanish synagogue in Moorish style is magnificently ornate. Arabesque designs fashioned after Spain’s, Alhambra fill the interior and

IMG_0252

colorful light pours in through the stained the 19th century stained glass.

IMG_0261

But one cannot come here and only enjoy the beauty this city has to offer. We are too close to the places where so much horror occurred. Enter deep into the Jewish quarter and history is steeped in the darkness and memory of the hundreds of thousands Jews murdered by the nazis.  It was difficult to focus on the tiny letters of the 80,000 names of the Bohemian and Moravian Jewish holocaust victims  hand written on the walls of the Pinka Syngogue .


IMG_0246

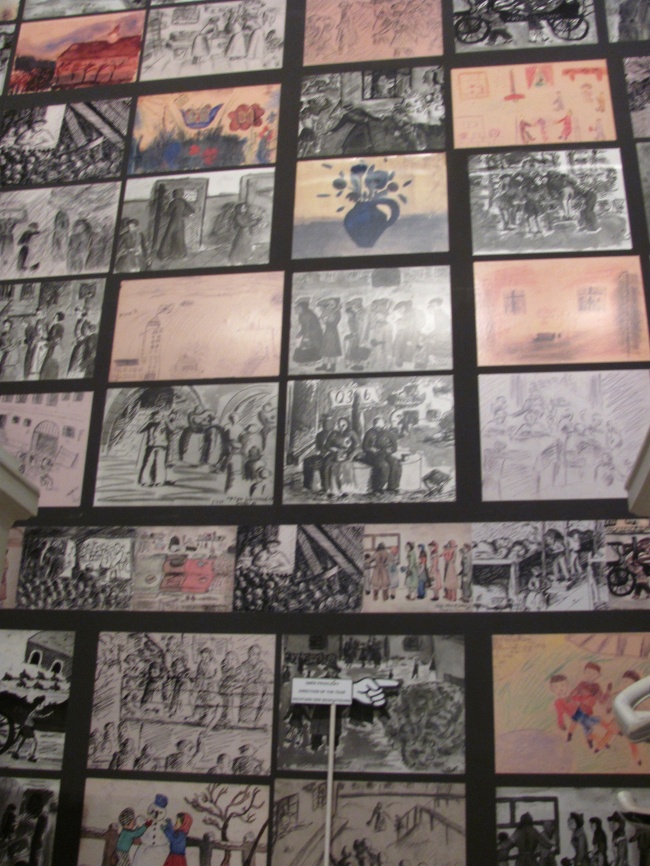
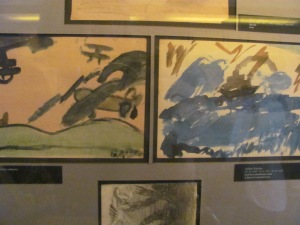
Even more haunting was the exhibit of children’s drawings from the ghetto of Terezin concentration camp recovered from the suitcase of a deportee. The vast majority of these tiny artists were sent to their deaths in Auschwitz shortly after the pictures were drawn.

IMG_0245

The drawings are filled with hopes and dreams of freedom. Teacher Friedl Dicker-Brandeis helped the children to forget their fears by giving them the creative outlet of drawing.

“Drawing opened the way for the children of Terezin to memories to the world from which they were torn. It enabled them to see and describe a sadness and the appalling reality but above all it carried them away to a world of fantasy and pure imagination where good triumphs over evil, where free will and abundance reign, where there is paradise on earth…. The children constantly expressed in their drawings the hope of the happy return home, often drawing roads and crossroads with sign posts pointing to Prague. Only a small fraction of the small children who passed through Terezin saw this hope fulfilled.”

Quoted from the wall of The Pinkas Synagogue memorial, Prague

April is genocide awareness month and an opportunity to remember those who perished. We cannot forget the victims of countless genocides in history.  We cannot forget that the Rwandan Genocide happened 20 years ago this month and we cannot forget those that suffer human rights abuses of death, slavery and torture, today in many places in the world.

I write this week in memory and in honor of the victims of genocide and the brave survivors, some of whom I have had the honor to know in my life and for the artists who offer space for healing expression for themselves and others.


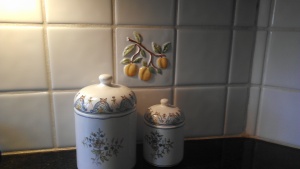
Wanted to show you a great solution for old tired and dated tile. A great way to save money and the environment. No need to drive around looking for new tile , spending money on new materials. Here’s a project we did to turn a ceramic tile into    the look of  authentic, copper. change the look of this kitchen backsplash.

IMAG0040


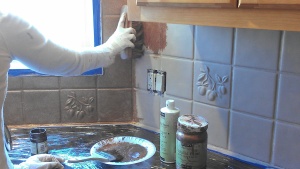
we started by applying Prime etch, a liquid product that seals any surface so that it will be a paintable.

IMAG0038


Let Prime etch dry over night and then basecoat the surface using a tinted freshstart primer. This will seal the surface further and prepare to hold a metallic paint. Make sure to paint all of the grout as well.

IMAG0039

Then use modern masters copper penny and antuqe copper. apply them both wet and blend together.  Use a stippling brush to hide any brush marks. Let dry and repeat so there is no trace of the light colored tile base.

IMAG0042IMAG0043


Once dry use a small cotton rag and the tip og your finger to apply   rub and buff antique copper  to the raised fruit ornament . Apply the darkening rub N’ Buff on all 4 corners of each and every tile.  This creates an aged look and also a contrast between the tiles and the grout color.

IMAG0044


Once dry, coat the entire surface with 2 coats of c500. I like to mix the dead flat with the satin for the perfect protective finish that is not too shiny or flat.,Amazingly bautiful. authentic and quick.

And don’t forget to do the light switch covers and outlets!

IMAG0047


Ever feel that white clothes are not really worth buying? After a few wearings, no matter how hard you try to keep them new and clean, they get a little dingy. Well today my niece and I decided to give a new life to old whites with some tie dye fun! I thought it would be a light, summer blog to share with you!

Walk in to any clothing store this spring and you will see tie dye is back with a vengeance. Skirts, scarves, hats, tops in all crazy designs and colors. Tie dye  is an art of the ages. Don’t be tricked  into spending money on something new. Just look in your own closet and find something white that you never wear and get tie dying!

Sarabeth and I tie dyed over 40 clothing pieces in just an hour. So here’s what we did. Work time doesn’t count when you are watching TV or chatting, or relaxing so we used some of that time to tie up the clothes in various ways.

Here are some of the interesting ways to elastic your whites….

IMG_4367

Tie elastic tightly about 3 inches apart going up each sleeve and center separately.

IMG_4365

Bunch your clothing piece into a ball and wrap elastic back and forth over the ball.

IMG_4368

Twist your clothing piece first and then tie elastics every few inches apart.

You can get pretty creative with this. Try making a bulls eye/target design by pulling the center of a shirt first wrap an elastic and then work your way out to the bottom every few inches. Avoid making targets on certain parts of the body…If you know what I mean!

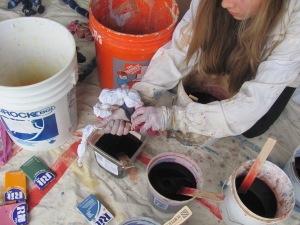
Then mix your tie dye colors. Boil about a gallon of water for half a box of Rit Dye.  You can get Rit at your local drug store, Walmart or Target. You can use more dye if you want a stronger color. Add 1/2 cup of salt (check the box because I tie dye like I cook -no measuring), to the mix to help the colors set. Colors will fade a bit on the first washing but the salt helps to keep them strong. We mixed 7 colors; orange, magenta, denim, royal, teal, red and taupe.

IMG_4375

 Once the items are tied up you can dip them in many different ways. Each technique creates a totally different design. Start by dipping about 2 inches of an item into one color. Squeeze the excess back into the bucket and then move to the next color, dipping another few inches. Squeeze the excess and continue the process.

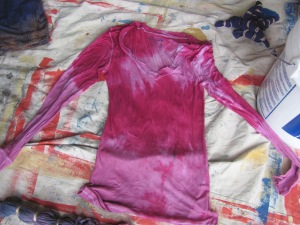
IMG_4374IMG_4376We combined like colors for a more subtle look and added taupe to tone down brighter colrs. After each item is totally dipped. Just leave it on a tarp to set for a few hours.

IMG_4370 IMG_4369Dipping one item entirely into one color can look awesome. Also you can open up the inside of the items and dip the center a bit to avoid having too much white when you are finished.

We also did some dying without using elastics. The color has a washed out and softly dyed look.

IMG_4378

 Then we also did the “multi color dip method” by taking the item without elastics and dipping it slowly into a few different colors. This is great for  skirts, pants and things you wnat to be more  muted. Try teal, denim and taupe. Gorgeous! Or do a shirt crazy and bold. I think I ended up redipping this one!

IMG_4371

Mini skirts are much cuter on a teenager!   So Sb got to take this one home!

IMG_4372

After a few hours, untie the items that have been tied with elastics. The items will still be damp.

IMG_4379

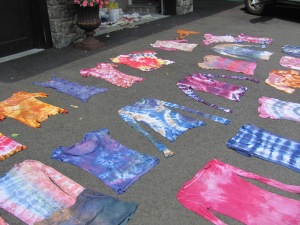
Once untied. Lay each item out to complete drying in the sun.

IMG_4373

Can you believe some of these were ready to be rags!IMG_4380

Wash the like items together without any of your other clothes for a few cycles before including them with your other laundry. (I always add a little extra salt into the first wash, about another 1/2 cup) If you want the colors to fade a lot, wash the clothes in hot water, otherwise cold is fine.  Always do whites separately or they’ll end up in the next tie dye pile!!!!

Although I am not a tie dye expert, the clothes came out great. There are so many more techniques you can investigate on line. But it does not take any expert to have great success on the first try.  Hope you find some old dingy white clothes and have a fun, cool time tie dying this summer!